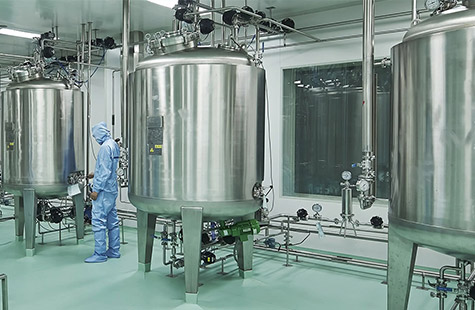
Sanitary diaphragm valves are widely used in food processing, pharmaceutical, biotechnology, beverage, and other hygienic fluid handling systems. Proper installation is important for maintaining reliable sealing, smooth operation, hygienic performance, and long service life.
During installation, several common problems may occur. Understanding these problems and their solutions can help reduce leakage, operating problems, and premature diaphragm failure.
1. Common Problems Before Installation
1.1 Incorrect Valve Model or Size
Problem:
The selected sanitary diaphragm valve does not match the operating conditions or pipeline requirements.
This may occur when the valve size, connection type, pressure rating, temperature range, or diaphragm material is not properly checked before installation.
Solution:
Before installation, verify the following:
- Valve size
- Connection type
- Operating pressure
- Operating temperature
- Process medium
- Diaphragm material
- Pipeline specifications
Make sure the selected valve matches the actual system requirements and the manufacturer’s specifications.
1.2 Incomplete Visual Inspection
Problem:
The valve is installed without a complete inspection, and damage or deformation is discovered after installation.
Solution:
Before installation, carefully inspect the valve for:
- Physical damage
- Corrosion
- Deformation
- Damaged connection surfaces
- Cracks or deterioration of the diaphragm
- Contamination inside the valve
If any component is damaged, it should be repaired or replaced before installation.
2. Common Problems During Installation
2.1 Improper Connection Tightening
Problem:
The connection between the valve and pipeline is either insufficiently tightened or over-tightened, resulting in leakage or damage.
Solution:
Tighten the connection according to the manufacturer’s recommended procedure.
Avoid excessive tightening, which can damage gaskets, connection components, or sealing surfaces.
After installation, inspect the connection and perform an appropriate leak test before putting the system into service.
2.2 Diaphragm Damage
Problem:
The diaphragm may be damaged during installation due to improper handling, excessive force, or contact with sharp tools.
A damaged diaphragm can result in leakage and reduced valve performance.
Solution:
During installation:
- Handle the diaphragm carefully.
- Avoid sharp tools near the diaphragm.
- Do not apply excessive force.
- Keep sealing surfaces clean.
- Do not install a damaged diaphragm.
If the diaphragm is found to be cracked, punctured, deformed, or otherwise damaged, replace it before operating the valve.
2.3 Incorrect Installation Orientation
Problem:
The valve is installed incorrectly according to the manufacturer’s installation requirements, potentially causing abnormal operation or sealing problems.
Solution:
Before installation, carefully check the valve manufacturer’s instructions and confirm the recommended installation orientation.
After installation, operate the valve several times to verify that:
- The valve opens smoothly.
- The valve closes properly.
- The operating mechanism does not bind.
- There is no abnormal resistance.
- The diaphragm operates correctly.
3. Common Problems After Installation
3.1 Valve Leakage
Possible Causes:
- Loose connections
- Damaged diaphragm
- Damaged sealing surfaces
- Incorrect assembly
- Improper gasket installation
- Contamination on sealing surfaces
Solutions:
First inspect the valve connections and tighten them if necessary.
Then inspect the diaphragm and sealing surfaces for damage or contamination.
If the diaphragm is damaged, replace it with a suitable replacement.
If the sealing surface is damaged or deformed, the affected component may need to be repaired or replaced.
A suitable pressure or vacuum leak test should be performed after corrective work.
3.2 Difficult Opening or Closing
Possible Causes:
- Operating mechanism obstruction
- Contamination
- Incorrect assembly
- Excessive diaphragm compression
- Damaged internal components
Solutions:
Check whether the operating mechanism moves freely and remove any contamination or obstruction.
Inspect the diaphragm and internal components for abnormal deformation or damage.
Do not force the valve closed or open with excessive torque, as this may damage the operating mechanism or diaphragm.
4. Other Important Precautions
4.1 Do Not Apply Incompatible Grease or Oil
Do not apply grease or oil directly to rubber-lined surfaces or elastomer diaphragms unless specifically permitted by the valve manufacturer.
Some lubricants may cause elastomer materials to swell, deteriorate, or lose their mechanical properties.
For sanitary applications, only use lubricants that are specifically approved for the valve and the intended process environment.
4.2 Protect the Handwheel and Actuator
The handwheel or actuator should not be used as a lifting point.
Do not use the handwheel to lift the valve or pipeline assembly, and avoid impact or mechanical damage during transportation and installation.
For larger valves, use appropriate lifting equipment and lifting points specified by the manufacturer.
4.3 Operate the Valve Correctly
When operating a manual sanitary diaphragm valve, do not use an extension bar or other auxiliary tool to increase operating torque unless specifically permitted by the manufacturer.
Excessive torque may damage the actuator, diaphragm, or sealing components.
Operate the valve using the intended handwheel or operating mechanism.
4.4 Proper Storage
When sanitary diaphragm valves are not immediately installed, they should be stored in a clean, dry, and well-ventilated indoor environment.
Recommended storage practices include:
- Keep the valve protected from moisture.
- Avoid direct exposure to harsh environmental conditions.
- Protect connection surfaces from contamination.
- Keep protective caps or covers installed.
- Avoid stacking valves in a way that could cause mechanical damage.
- Follow the manufacturer’s recommended storage position.
For long-term storage, the valve should be inspected before installation to ensure that the diaphragm, sealing components, and connection surfaces remain in good condition.
5. Sanitary Diaphragm Valve Installation Checklist
Before commissioning a sanitary diaphragm valve, check the following:
| Inspection Item | What to Check |
|---|---|
| Valve model | Correct size and specification |
| Material | Valve body and diaphragm material |
| Connections | Correct connection type and size |
| Diaphragm | No cracks, damage, or deformation |
| Sealing surfaces | Clean and undamaged |
| Installation | Correct orientation and alignment |
| Bolts/connections | Properly and evenly tightened |
| Operation | Smooth opening and closing |
| Leakage | No leakage after testing |
| Storage | Clean and dry before installation |
Conclusion
Correct installation is essential for achieving reliable performance from a sanitary diaphragm valve.
Before installation, verify the valve model, size, materials, operating conditions, and connection specifications. During installation, protect the diaphragm, avoid excessive tightening, maintain clean sealing surfaces, and follow the manufacturer’s installation instructions.
After installation, perform operational and leakage checks to confirm that the valve opens and closes correctly and provides reliable sealing.
Proper installation, operation, storage, and maintenance can help extend the service life of sanitary diaphragm valves and improve the reliability of hygienic processing systems.
